Version 2
Version 2 is not yet available through all labels, right now it is only mostly used for BetMGM Sports Tickets
Content > Vanilla.Mobile > State/Brand > MobilePortal-v1.0 > Public Pages > promotions > Label
Creating the MPP
When creating the MPP component you can either:
- Duplicate from template folder
- Duplicate a sibling MPP - You can also duplicate an existing MPP on the same state brand, aterwards rename the parent item to the provided name.
The template is only avalable at BetMGM NJ. Make sure to copy it to the correct state.
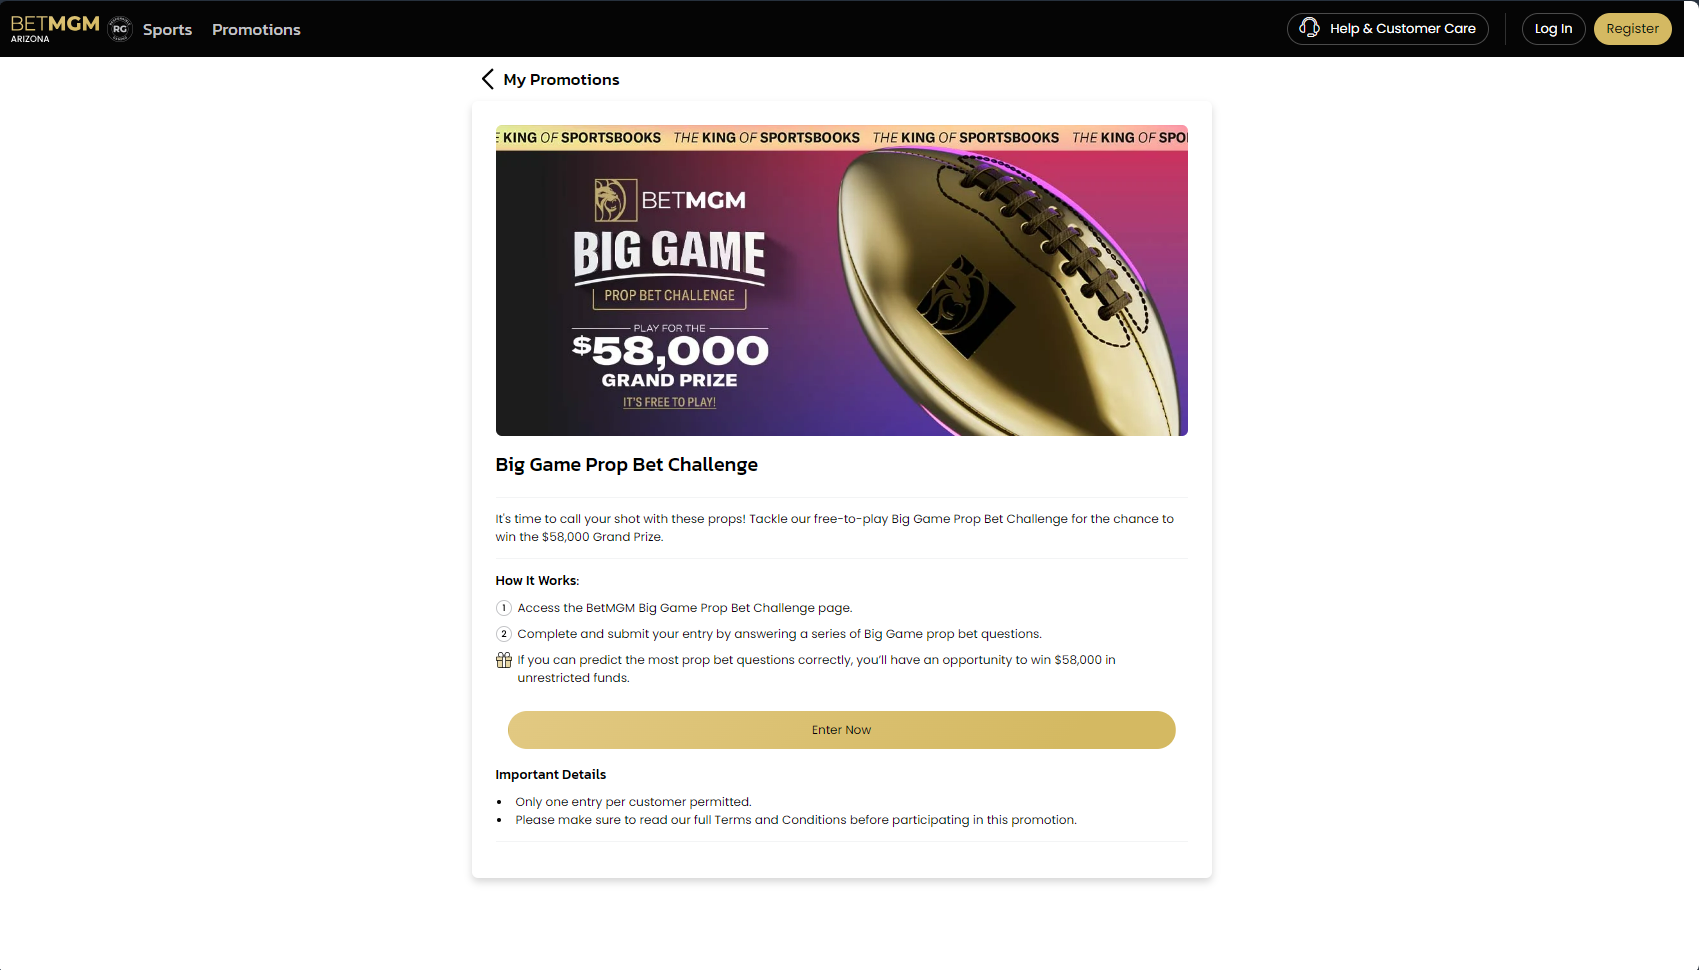
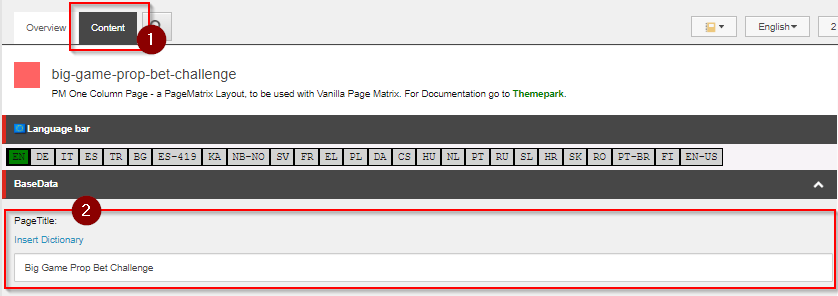
PageTitle
Select the parent and go to its Content Tab. Replace the PageTitle field in this field with Promohub Key Terms H1
This will be the name of the Tab when visiting the MPP page through the browser.
Content
The Content child contains child of the components of the MPP. The components are separated individually.
Because on different applications some of the sections is not necessary, and these components can be set to Not Publish so that it wont show in the MPP when viewing through the browser.
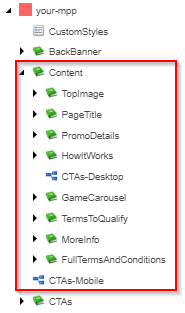
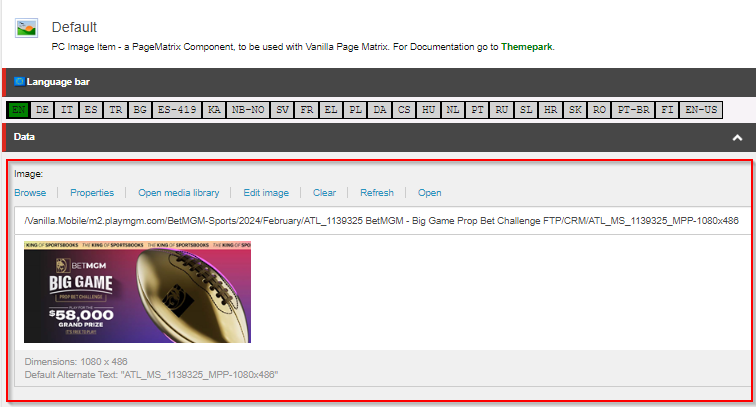
Top Image
The Top image can be updated through Content > TopImage > Default child.
Use the image MPP-1080x486 and place its path on the Image field.
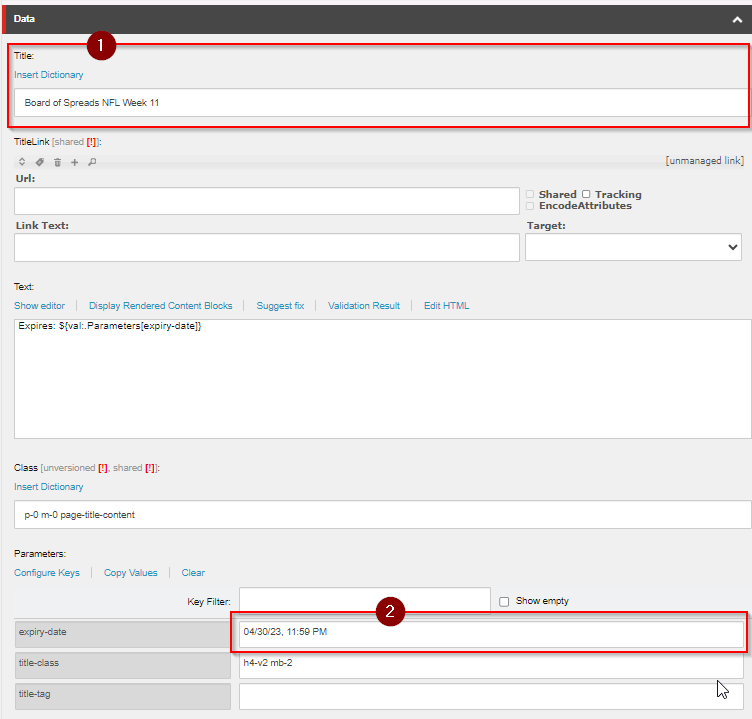
PageTitle
Compared to the PageTitle mentioned above this PageTitle will be shown on the MPP on the bottom of the image.
This is located on Content > PageTitle > DefaultPageTitle
- Update the
Titlefield withPromohub Key Terms > H1. - If there is a
Promotional Datesindicated on your copy place it on theepiry-datefield underParameters
Make sure that the date is on MM/DD/YY format, and add the time of 11:59 PM.
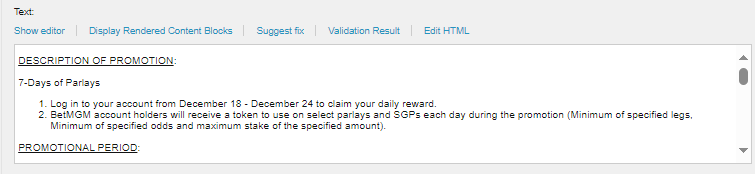
PromoDetails
Located on Content > PromoDetails > DefaultPromoDetails.
Use the content of the Promotion Description from your copy and place it on the Text field.
Remember to enclose the contents with <p></p> tags
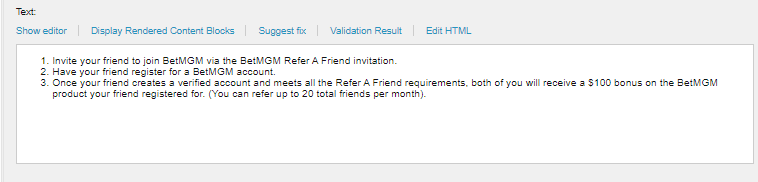
HowItWorks
Located on Content > PromoDetails > DefaultHowItWorks.
Use the content of the How It Works section from your copy and place it on the Text field. Just use the format for HTML ordered list.
<ol>
<li>Step 1</li>
<li>Step 2</li>
<li>Step 3</li>
</ol>
GameCarousel
The Game Carousel contains the tiles for games that players are eligible to play. Most of the time this is only used when building the MPP for Casino.
Slider
Clicking the Content tab for the Slider, here are some of the fields that can be changed to configure the slider:
- MaxItems - is the maximum number of tiles to be displayed in the MPP. Set it to the number of eligible games mentioned for your ticket.
- slidesPerView - number of tiles that is visible.
- slidesPerGroup - number of tiles to be moved when sliding through the slider.
Updating a Game Tile
- Click on an item under the
Slider. - Get the game code from the Game Smartlinks of the appropriate game.
- Update the content of the
Textfield. You can refer to the format below. - Save, Publish and Finalize.
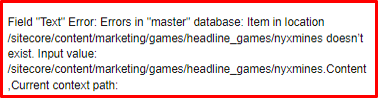
${val:/sitecore/content/marketing/games/headline_games/{game code}.Content}
Sometimes an error will occur when you try to save a game that is because the game is not in the path. This can happen even if the game is live on the site
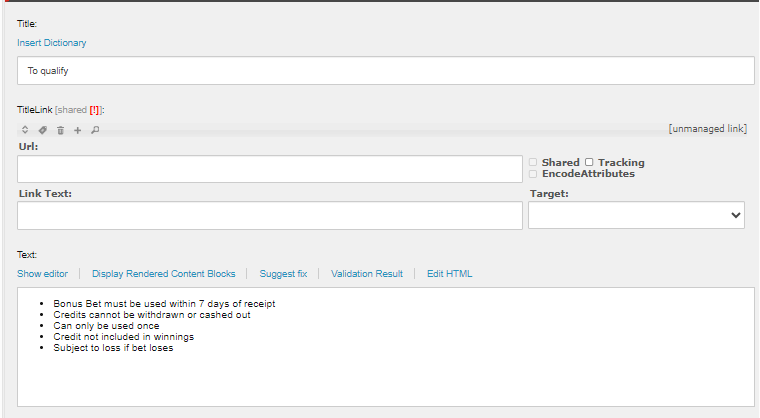
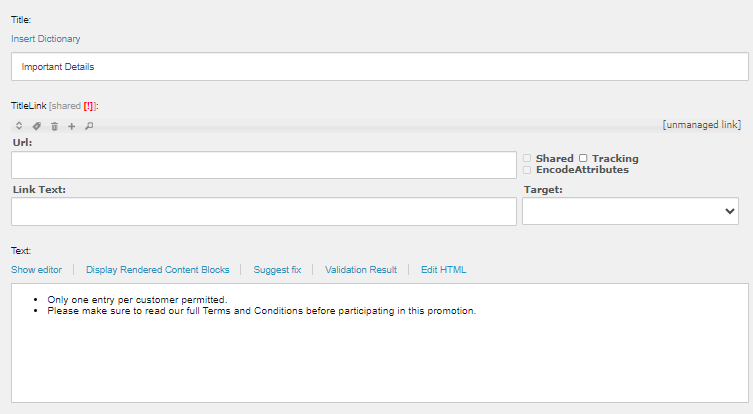
TermsToQualify
This section can be used to place additional notes mentioned in the copy but there is no specific component for it.
This can be edited on Content > PromoDetails > DefaultTermsToQualify.
- Update the
Titlefor the appropriate label of the content. - Place the content on the
Textfield.
Examples
- Default
- Important Details
- Additional Notes
MoreInfo
Located on Content > PromoDetails > DefaultMoreInfo. This section can be optional as it will be depending if there is a More Info section in your copy.
FullTermsAndConditions
Contains the Terms and Condition section. To edit the contents go to Content > PromoDetails > DefaultFullTermsAndConditions.
Place the contents of the Terms and Conditions on the Text Field.
Make sure that your terms is clean. Check the Cleaning Documents page for a thorough guide on how to clean the TnCs copy.
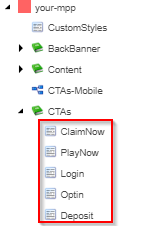
CTAs
The CTAs component contains 5 child components, each of the componetns are rendered as buttons in the MPP. depending on our use case we can just pulblish or unpublish what buttons we want to be shown.
Each component has their own set of fields, and some of it has already initial values that can be changed.
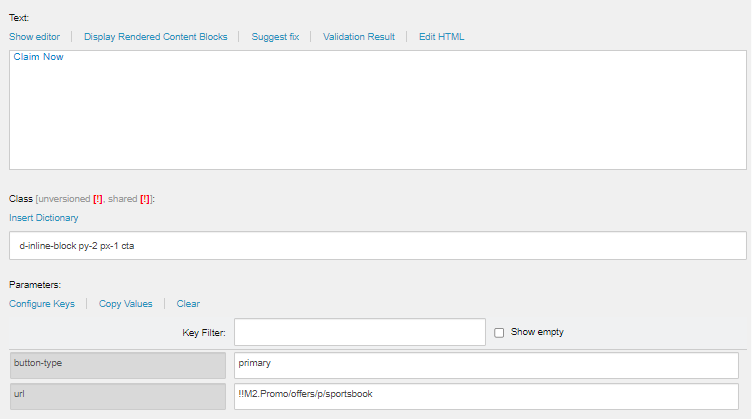
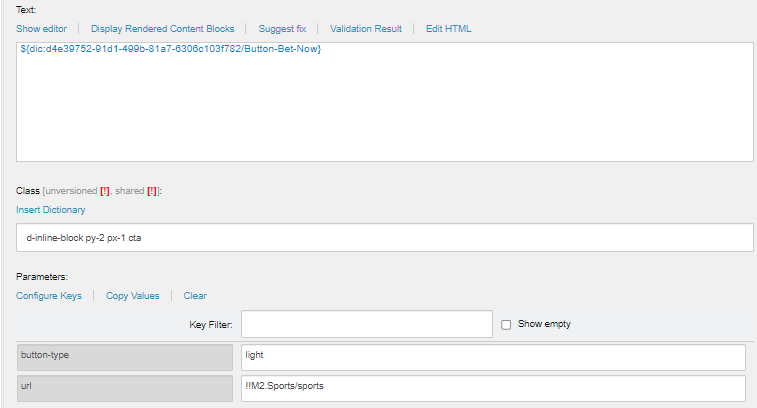
Here are the fields that can be updated to configure the CTA. Some fields are only present in some CTA,
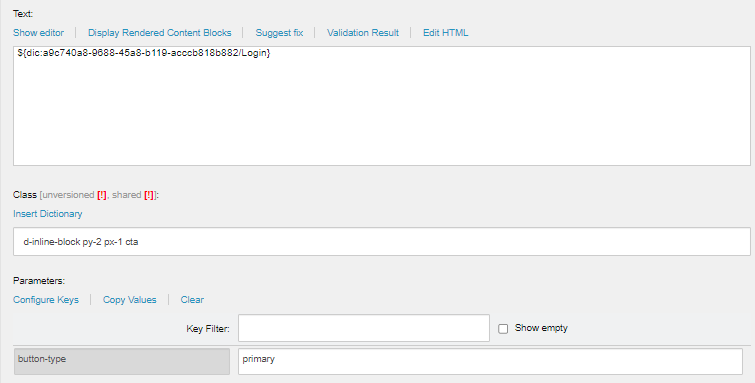
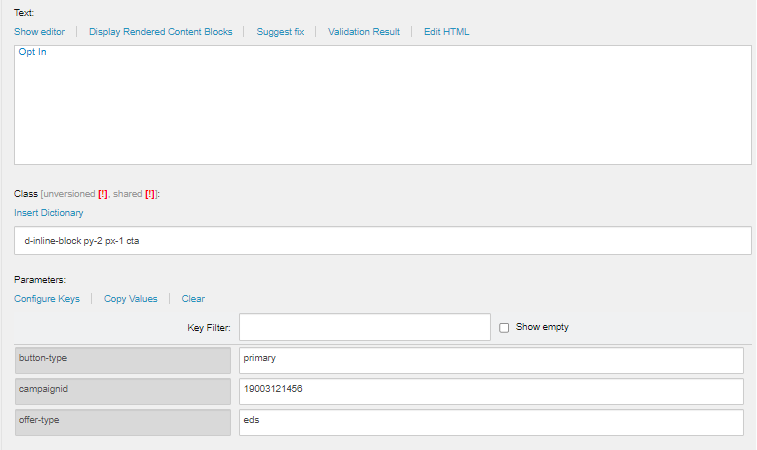
- Text - Update the text of the button. often times this does not need to be changed, but in rare occasion that there needs to be a CTA that is not available from the pre-made CTAs we can update the name of the CTA.
- button-type - Indicates the color of the CTA. There are only 2 values for this:
primaryandlight.- primary - can be used for single CTA MPP, but if there are multiple CTA, one CTA should have this value to indicate that its importance to the group of CTAs.
- light - used for other CTA along with a primary CTA
- url - contains the smartlink or url to be used when a user clicks the CTA.
- campaignId - used for promotions that needs to
Opt Inwe can place the value of thePAT IDorEDS ID. - offer-type - alongside
campaignId, it indicated what type of promotion the CTA us being used for, the values can be used here ispromoandeds.
Here are the pre-made CTAs and their fields:
- Claim Now
- Play Now
- Login
- Opt In
- Deposit

Whitelabel MPP
When the MPP is idicated to be made in Whitelabel, most of the time this is because it should be available through multiple states .
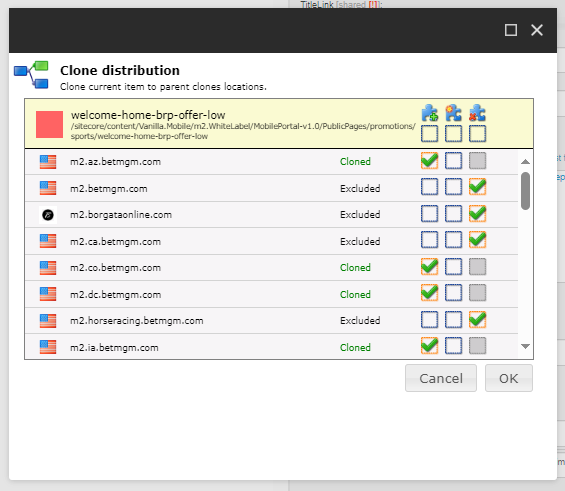
To do this we will create a single MPP under the Whitelabel path and clone the MPP to the other states. Cloning will be done to all published components of the MPP, so no need to clone components that are not published. Here are the specific steps for cloning.
-
Open the
Clone Distributionpanel by right clicking the parent component.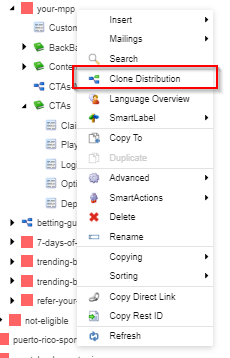
-
Select all the states to clone the MPP and click OK.
-
Go through each published subcomponent and when opening the
Clone Distributionpanel we can just click theClone Allcheckbox as it will select all locations we have set to the parent when we have clones it. Then click OK.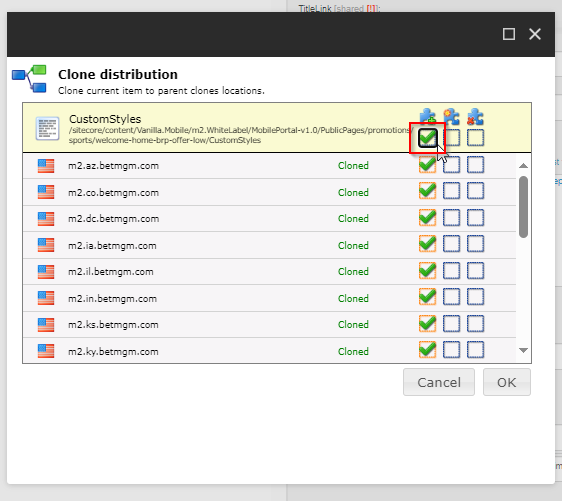
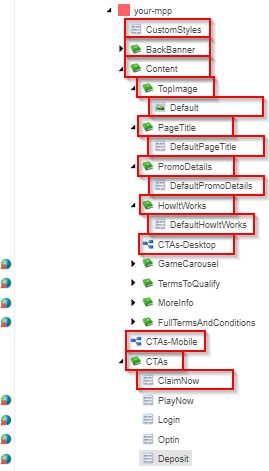
Example of Components to Clone
Check if it is properly cloned by previewing the Final URL for the MPP for all states that you cloned the MPP to.